Tiling in Varna: bathroom, kitchen and floor tiles
A tile holds only as well as the base under it. Before a single tile is laid we check that the screed and the wall are dry, flat and sound, and in a shower the tiles wait for the waterproofing. You buy the tiles; we organise the rest and stay your one phone number.
Our clients on video · all videos (in Bulgarian)
Tiling in Varna covers wall and floor tiles in bathrooms, kitchens and halls, a kitchen splashback and the odd loose tile. You buy the tiles; they are laid on a base that has been checked first: dry, flat and sound. After a leak we measure the screed with a moisture meter, and in a shower area the tiles go on only after the waterproofing has dried. The work is carried out by the craftsmen we work with; we organise it and remain your one phone number. Renovation is a newer line of work for us, so we say plainly what we take on. We give the price by phone after a short description and photos. Call +359 52 993 333 or email info@kanalvarna.com with the address and photos; write to us in English and we reply in English.
Updated November 2026What we tile, and what we do not
Wall and floor tiles in a bathroom, kitchen or hall; a splashback between the worktop and the wall cabinets; porcelain tiles; and single tiles that have come loose. We do not sell tiles. You choose and buy them, and we work with what you bought. Tiling is one stage of a flat renovation: it comes after the strip-out and the plumbing, and before the silicone and the paint. The full order of work is on the page about home renovation in Varna.
Moving sockets and switches in the tiled wall is for an electrician, because 230 V work is not ours, and we do not tile the outside of a building at height.
Tile adhesive (C1 and C2). A dry cement-based powder mixed with water that fixes the tile to the base. C1 is the normal grade and C2 the improved one; extra letters show features such as fast setting (F), less slipping on a wall (T) or flexibility (S1, S2). Porcelain tiles, large tiles, underfloor heating and tiles over old tiles normally need C2.
Check the base first: dry, flat and sound
Mixing more adhesive does not cure a wet, crumbling or uneven screed. After a leak this is the first thing we look at, because measuring moisture is our main work. Water in a screed under tiles leaves slowly, almost only through the grout lines, so we do not tile over a screed that is still drying. We measure it and compare the wet area with dry places in the same flat. While the difference shows, we wait. How a floor dries is explained on the page about water under the floor.
- Moisture. The screed and the bottom of the walls are measured, because leak water often reaches there too.
- Flatness. A long straight edge laid on the wall and the floor shows the dips. Big ones are levelled first; adhesive is not meant to fill holes.
- Strength. We tap and scratch: crumbling areas, flaking paint and hollow patches are taken off.
- New screed. It has to dry first; how long depends on its thickness and the maker's instructions.
In a shower area and around the bath, tiles come after the waterproofing. The membrane, with tape in the corners and round the drain, protects the slab; the tile and the grout only turn most of the water away. We tile once the membrane has dried according to its instructions, with an adhesive compatible with it. More on that stage is on the page about bathroom waterproofing.
Old tiles still to come off are dealt with on the page about tile removal; the debris is described under builders' waste removal. If the base is crooked or sounds hollow, a new floor screed or self-levelling compound comes before the tiles.
A hollow tile, a crack or standing water: sign and cause
Most tile problems come from the adhesive and the base, not from the tile itself. The table gives the usual signs and where we start.
| Sign | Likely cause | What happens |
|---|---|---|
| A tile sounds hollow when tapped, or has dropped off | Adhesive laid in dabs, a skin formed before the tile went on, or a dusty unprimed base | The hollow tile comes off, the old adhesive is cleaned away and it is laid again with full coverage |
| A crack runs in a straight line through several tiles | A joint or crack in the screed was tiled over, or the base is moving | The joint in the screed is found and carried through the tiling as a flexible joint; cracked tiles are replaced |
| Water stands in the shower instead of running to the drain | The fall in the screed is wrong; the tiles only copy it | The fall is corrected in the screed, then waterproofing and new tiles; our plumber checks the drain |
| Tiles laid over old tiles are coming off | The old tiling was hollow, greasy or had no bonding primer | Both layers come off down to a sound base and the job is done again |
| The grout crumbles but the tiles are firm | Worn or weak grout, adhesive is fine | No new tiling needed; see regrouting |
Call or email with the number of square metres, the tiles and whether there was a leak underneath. We tell you what to check before you buy, and give the price before any work starts.
📞 +359 52 993 333Tiling step by step
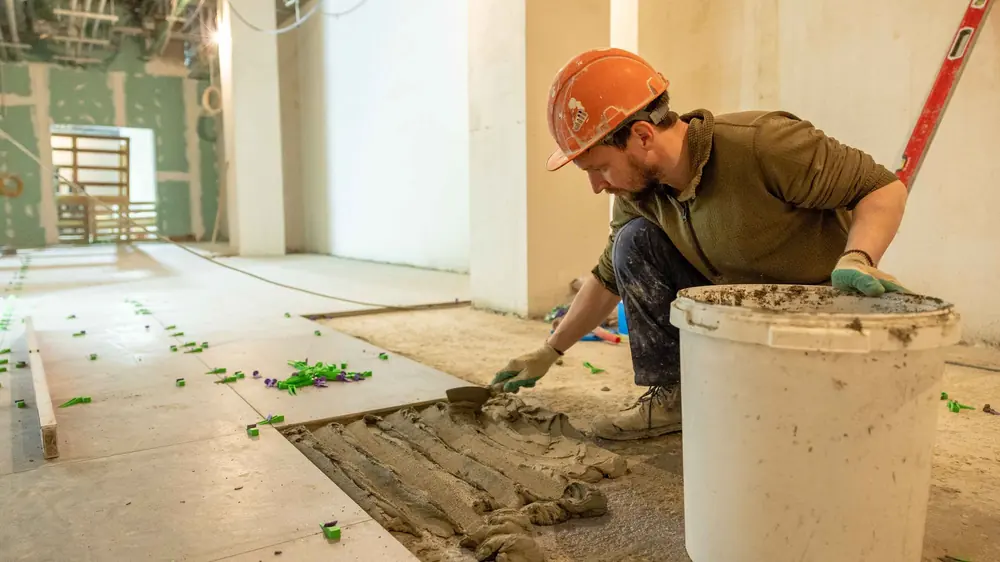
- Measuring. The area, the moisture and the flatness are measured, and you are told how many tiles to buy, with a reserve for cuts.
- Preparing the base. Loose material and old paint come off, holes are levelled and an absorbent base is primed. On old tiles: degreasing and a bonding primer.
- Setting out. The rows start from the middle of the wall or from the line the eye meets first, so the cut pieces end up in corners and behind the door. The first full row sits on a batten fixed to the wall and the bottom row is cut last.
- Adhesive and tile. Adhesive goes on with a notched trowel, a bigger notch for a bigger tile. Large tiles are coated on the base and on the back.
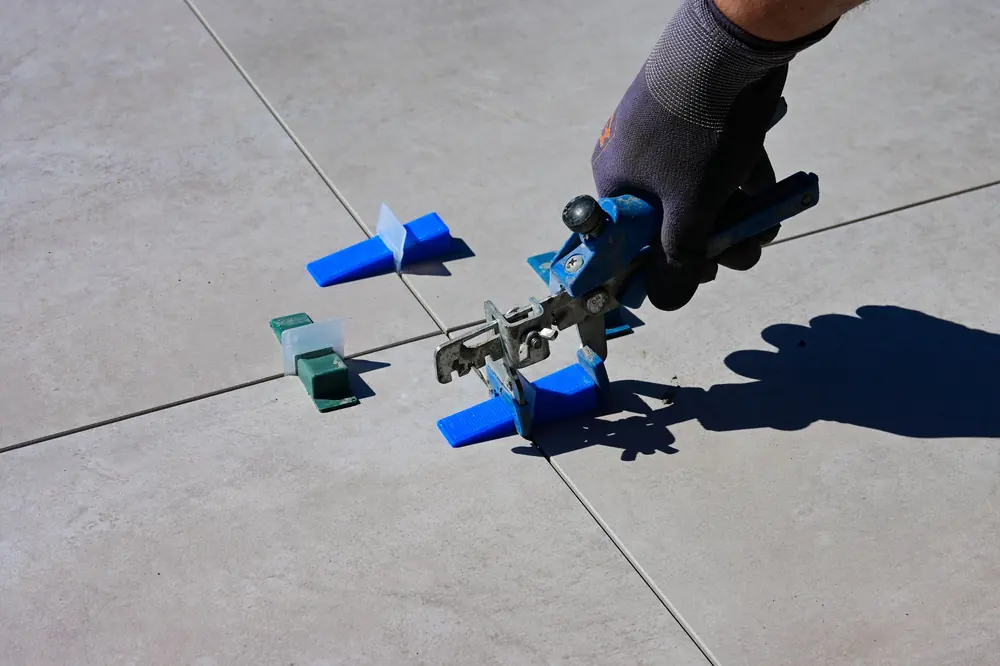
- Spacers and wedges. Spacers keep the joint even; on large tiles levelling wedges bring neighbouring edges flush while the adhesive sets. A tile is lifted now and then to check how much of the back has taken.
- Grout and silicone. Once the adhesive has set, as its instructions say, the wedges come out and the grout goes in. Corners and joints with the bath, the worktop or the floor are left for silicone, and movement joints are not filled with cement grout.
In a bathroom the walls usually go first, without the bottom row. Then the floor, and the bottom row of the wall sits on it, so the line between wall and floor is straight and ready for silicone. We agree the start day by phone. Grout haze on the tiles and adhesive in the trap come last; see after-builders clean.
Bathroom tiling: fall, access to taps and silicone
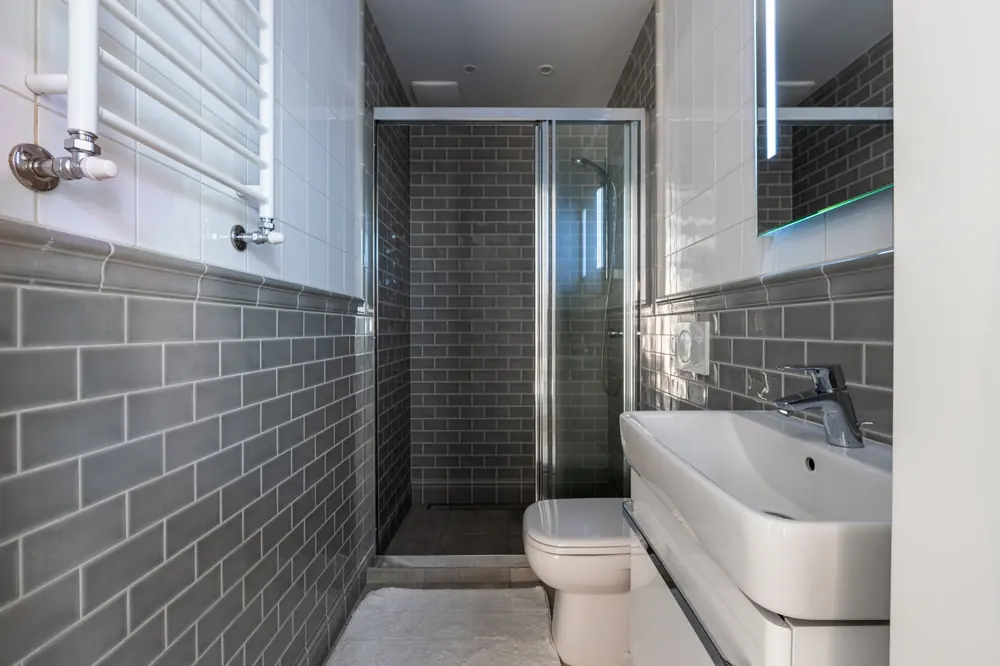
In a bathroom the tiles are the last visible layer of work that starts earlier: breaking out, our plumber's pipes, the fall and the waterproofing. If a stage was skipped, new tiles only hide it. For a whole bathroom, the order and the plumbing side are on the page about bathroom renovation.
- Fall to the drain. The shower floor falls to the drain, and so does the rest of the room, not towards the door. The fall is made in the screed before the membrane.
- An access hatch. The bath panel is tiled with an opening opposite the trap and the connections, and stopcocks and the water meter are not walled in.
- Silicone, not grout. Inside corners, the line between wall and floor, the edge of the bath or shower tray and pipe entries are sealed with sanitary silicone. A bath sinks slightly under water and a person, and walls and floor move differently, so hard grout cracks there and lets water through.
- The bath before the walls. The bath or tray is fitted and levelled before the wall above it is tiled.
What to tell us, and what the price depends on
The price depends on the tiles and the base, so we give it by phone after a short description and photos, before any work starts. Tell us:
- how many square metres of wall and floor, separately;
- the tile size, and whether they are porcelain, mosaic or large format;
- straight, diagonal or another pattern;
- whether old tiles have to come off and whether there was a leak underneath;
- whether waterproofing and an access hatch are needed;
- whether the tiles and the adhesive are bought, and how many boxes you have;
- which floor you are on and whether there is a lift.
The price follows the area, the size and type of tile (large ones and mosaic take longer), the number of cuts around pipes and corners, how much the base must be straightened and whether the old tiles come off first. Only a few loose tiles? Ask; a small job can be agreed too. We issue an invoice. Payment is by cash, card or bank transfer after the work.
If you live abroad or let the flat out
Email the address, photos of the wall and floor to be tiled, the number of tiles and boxes you have bought, and the name and number of whoever can open the door: a neighbour, a cleaner, the building manager. Noisy work in a block is done only in the hours the building's rules and the municipality allow, so tell the building manager what is planned. We tell you by phone whether and when we can start, and you can pay by bank transfer after the work. Write to us in English and we reply in English.
Frequently asked questions
Do you lay new tiles over old ones?
Only if the old ones hold firmly everywhere, the base under them is dry and the height allows for the door, the threshold and the drain. We tap them one by one and remove the hollow ones. The glaze is degreased and primed, and the adhesive is C2. In a shower area, or where there was a leak under the old tiles, we advise taking them off down to the base.
When can I walk on the new tiles?
It depends on the adhesive and the grout; their packs give the times. With ordinary adhesive on a floor you can usually step carefully the next day, and the shower is used once the grout and the silicone have dried. Fast-setting mixes allow it sooner. On handover we tell you the exact times for your materials.
Do you buy the tiles?
No, we do not sell tiles; you buy them wherever you like. Before you buy we tell you how many square metres to get, with a reserve for cuts, and what to look at on the boxes: the same batch, shade and size. Who buys the adhesive, the primer and the spacers we agree by phone.
Do you do the waterproofing under the tiles?
Waterproofing is a separate stage before the tiles, described on bathroom waterproofing. Whether we take it on in the same renovation we tell you by phone. For the tiles it matters that the membrane has dried, that corners and the drain have tape and that the adhesive suits it.
I live abroad and let the flat out. Can you deal with it?
Yes. Email the address, photos, the sizes and who holds the keys. We describe the job, give the price by phone before any work starts, and organise the work through the craftsmen we work with. You pay after the work.
Related pages
The order of renovation work, from strip-out to paint Tile removal
Taking the old tiles off before the new ones Bathroom waterproofing
The membrane under the tiles in the shower area Regrouting
When the tiles are sound but the grout is not Water under the floor
When the screed is dry enough for new tiles
Tiles to lay in the bathroom, kitchen or hall?
Call or email with the number of square metres, the tiles and whether there was a leak underneath. We tell you what to check before you buy, and give the price before any work starts.
📞 +359 52 993 333or email info@kanalvarna.com — write in English and we reply in English.
Send us a message
Leave your name and a phone number with the country code. Add your email if you prefer a written reply — write in English and we reply in English. We confirm the price before any work starts.